Thursday, 28 March 2013

Title name change


Changing the DVD title name


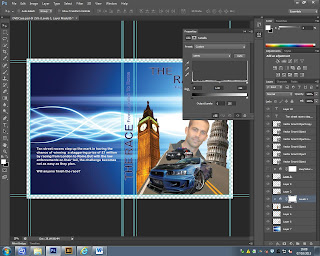
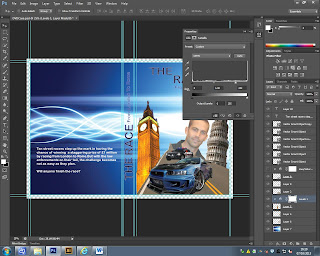
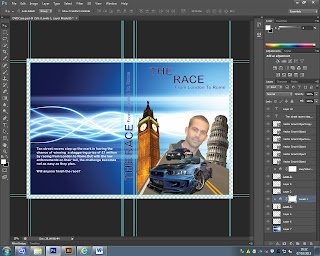
Originally  I had the DVD title as 'The Race' however I have now changed the DVD title to 'The Pursuit' as this is a much more catchy title for the DVD and therefore if the DVD was then was officially published  then it would catch peoples eye in which I am hoping to do. Also have the DVD title as 'The Pursuit' gives a much better fit to what the whole film is about too.


Wednesday, 27 March 2013

Editing the DVD logo

Editing the DVD logo


Now I am going to be adding a DVD logo onto my DVD case because this is what is on all DVD's and also it makes the cover look professional too.


First of all I open up the logo into Adobe Photoshop. 


I then select the magnetic selection tool as this is the best tool to use due to the contrast of black and white and therefore I will be able to easily select just the DVD logo title .


I then select all the areas that I need from the logo.


 I then copy and paste the select area on to the DVD cover . 


 I then move the logo into the place that I wish to have the logo.
 

Editing the transparency of Paul Walker

Editing the transparency of Paul Walker


Now that I have adjusted the image of Big Ben I am now going to edit the image of Paul Walker as I would like to have him faded slightly into the background. To be able to accomplish this I will need to alter the transparency of the image. 


First of all I select the layer in which consists of the image of Paul Walker. 


After selecting the correct layer I then go to the section in which is about the opacity of the image at the current moment it is at 100%. To change this is clicked on the little white arrow next to the percentage. Once I had done that it then came up with a movable scroll bar and by moving the arrow on the scroll bar changes the opacity/transparency of the image.


I then move the arrow up and down the scroll bar until I have the opactiy /transparency that I am satisified with and want the image to have on the DVD cover.

Tuesday, 12 March 2013

Using Levels to adjust Big Ben


Now I have the front of the case done I now can start editing the layers if necessary. The first thing I am going to be doing is by using the level function I will brighten up the image of Big Ben. Down below is how I do this:


So first of all I select the layer that has the image of Big Ben on and then I go to the adjustments tab at the top on the right hand side and then click on the ‘levels’ icon.


After clicking on the level icon it then appears with a box where I can then start altering the levels of the image. Also I can change the presets and the colour mode to However for this instance I will be keeping the preset as default and keeping the colour mode to CMYK as I want to keep the colours the same as there are now on the im age however I will alter the level to ensure that the image just gets a little brighter.


I click on the icon with the box and the arrow pointing down so that when I start altering the levels that it only alters the image for Big Ben and therefore doesn’t affect any other parts of the front cover.


I then play around with the levels until I have found the level that I am happy with and the brightness I want to have.  I chose to have the level 202 as it illuminates Big Ben really well and makes the building stand out on the front cover.
 
 
Before


After


Putting everything together

Once I have all the images I need for the front I then put all these together on the front of the DVD template.

Editing Paul Walker

The final image that I need to edit for the front cover is the actor of Paul Walker.
 
 
I then open up the image of Paul Walker and select the magnetic tool to edit the image. I chose to select the image of the magnetic tool is due to the background being brighter than the image of Paul Walker then with the magnetic tool it will perfectly select Paul Walker due to the contrast .


 I then copy the selected area that I have chosen to select from the original image.


Finally I then paste ther image on a new page for later use.

Editing the Tower of Pisa

Just like I have done with Big Ben I now going to be editing the Tower of Pisa image as that is part of the construction on the front cover of the DVD case.

Firstly I opened up the tower of pisa image into Photoshop and then I select the selcetion tool I wish tyo use to help me edit this image. The selection tool that I am going to use is the polygon tool as I am able to get  close to the image as possible whihc means I reduce the the background showing and also able to do the straight parts of the image easy.


I then copy the selected area of the image I have just selected.


 I then paste the selected area onto a new page.


As I can see that some of the background is still showing I then again use the lasso tool as this will enable me to go into tricky angles and corners that are consisted within the image.


After finishing with the lasso tool I am left with a perfect image which can just be put straight on the front cover without anymore editing needed.

Editing Big Ben image for DVD

The next image that I will be editing is the image of Big Ben. The image will be appearing on the front of the DVD  and also will stand out to people.


The first thing that I do is open up the big ben image and then select the polygon lasso tool this again is due to the image consisting of straight lines I am able to easily but quickly select the part of the image that I would like to select.


Once I have selected the part of the image I would like to have on the front of the DVD I then copy the selected area.


I then paste the selected area on a new page however I still notice that some of the background is still shown as this is due to the awkward corners and curves of the Big Ben tower.


 I then select the lasso tool in which is a free forming tool and therefore this will then help me select all the rest of the background that I would like to delete but also help me get into the awkward corners of the image.


Once I have deleted the areas that I do not wish to have I am left witha perfect image of just the Big Ben tower. I then save the image for later use when I insert this image on the front of the DVD.


Editing the Police Car for DVD

I then do the same proceedure like I did to the Nissan Skylient o the police car that I will be using within my DVD case.
 
Once I have opened up the image i then select the polygon lasso tool as before with the other vehicle and this is because due to the car mainly having straights then it is easier for me to be able to use this tool to go around selcted just the car that I need


Once I have selected the whole car I then copy the image.


I then paste the selected image onto a new page ready to be put on to the front cover of my DVD.


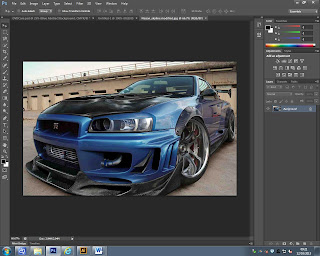
Editing the Nissan Skyline for the DVD

I am now going to be editing the Nissan Skyline which will be right at he front of the DVD case and will be one of the images that will stand out to people.
 
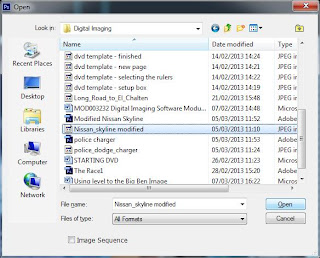
First of all I open up Photoshop and open up the Nissan Skyline image.


Once selected the image it the opens up within Photoshop in which I then can start editing the image if I wish to do so.


I then select the necessary selection tool that I need to use in order to help me edit this image so that in the end I am left with just the car. The selection tool that I am going to use is the polygon tool because due to the car having mainly straights then the polygon lasso tool best fits as you can draw straight lines using this tool very nicely.  


I then select just the whole of the Nissan Skyline.


I then copy and paste the selected Nissan and paste the image to a new page in order to use for a later date.


Tuesday, 5 March 2013

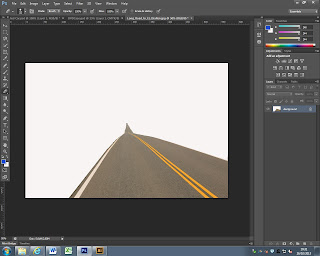
Editing the Road for DVD

After creating the title for the DVD that I have chosen to do , I then started with the editing of the road image.


The first thing that I did was open up the road image.


Once I then had the image opened I then selected the polygon lasso tool ready to select just the road.


Using the polygon lasso tool i selected the area that i wish to delete so that the road is just left.


Once I had deleted slected area I noticed that there was some of the background still in the image so therefore I then selected the lasso tool and i went round the road section making sure that no part of the background was left.


I was then left with just the road.


Creating the title for the DVD

Before I start editing and lookign at the resources that I have recently collected, I firstly want to concentrate on the making the title for the DVD . Down below is how I created the title.


Firstly I opened up Adobe Illustrator as that is the software program I will be using in order to make my title for my DVD. I then go to the panel on the left hand side and select the 'type tool'.


After selecting the type I then drew a text box and wrote the first letter of the titl. After I did this I then went to the fonts and started going throught some of them to see how the title would look like. I finally chose the font type that I really liked and therefore the font that iI would like to have on my DVD. I then wrote out the title of the DVD. 


Once I had finished writing the title out I then wanted to add an effect to make the title of the DVDV  stand out and look good too. So I went to the 'effect' tab at the tope of the screen, down to where it says 'Artistic' and then across to 'Neon Glow'. I want the title to have a neon glow as this will therefore help the title stand out on the DVD and will also then catch people's eyes if teh DVD was later published commercially.

After selecting the 'neon glow'option it then comes up with a screen in which I can edit the neon glow by colour, size and the brightness of the glow. I eventually come to a final decison on what I wanted the glow to be like and the colour that I chose was blue as this would go really well with the background that I have chosen to have for the DVD and also the brightness is set at max and therefore will meet my requirements of making the title stand out to people and on the DVD. I then click on 'OK' to apply the effect


Above is now my title for my DVD complete.

I have now changed the DVD title to 'The Pursuit', I also then copied and pasted the main title and created a sub-title for the DVD. I then reseized the font to a smaller size so that the main title name stands out.


Monday, 4 March 2013

Gathering the resources for DVD case

Now that I have made an decision on the film that I will be creating a DVD package for I now need to go and get the resources that I need to be able to successfully complete this.

Down below is how I ensured that the images I using are free to use and modify if necessary.


The first thing I did was go to the cog icon at the right hand side of the screen and then click on where it says "Advanced Search" 

 I then scrolled to the bottom of the page till I got to the section which is all about 'Usage Rights', i simply clicked on the arrow and went do to the option within the drop box which says 'free to use, share or modify , even commercially'. By me selecting this one means that whatever resources I use for my DVD package means that I am not breaking the copyright law and if I wished to then sell my DVD package i have the right to do so 
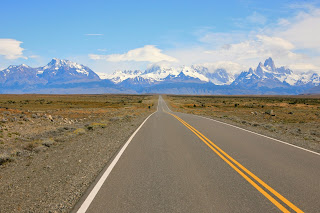
  Now at the top of the page it says that all the resources that I have searched for are 'labeled for commercial reuse with modification. Therefore I now can get all the resources I need. Down below are all the resources that I am going to be using  in order to create the DVD package of my chosen film that I decided on earlier.    http://i.images.cdn.fotopedia.com/flickr-5452083285-hd/Argentina/RegionsProvincesTowns/Patagonia/Santa_Cruz_Province/Lago_Argentino_Department/El_Chalten/Long_Road_to_El_Chalten.jpg